
Example - Residual Risk Email Notification
Introduction
Create an automation that will send an email to a selected list of users when the set Residual Risk threshold has been met.
Step-by-Step Guide
Navigate to the Organization Details module
Open the ‘Automations’ page
On the top right of the grid, click on the ‘Create’ button
The modal for creating a new Automation will appear, and the modal will include multiple fields. The fields are:
‘Name’
‘Enable’
‘Trigger’
‘Automations’

5. The user may now name the Automation and decide whether they would like to ‘Enable’ the automation. Turning on the ‘Enable' field will allow the Automation to check its ‘Trigger’ criteria and run (if applicable) as soon as the Automation has been created.
6. Change the trigger type to ‘Resource Updated’, this will now generate new fields that may be used to customize the Automation. The new fields are:
‘Enable Cooldown Period’
‘Conditions’
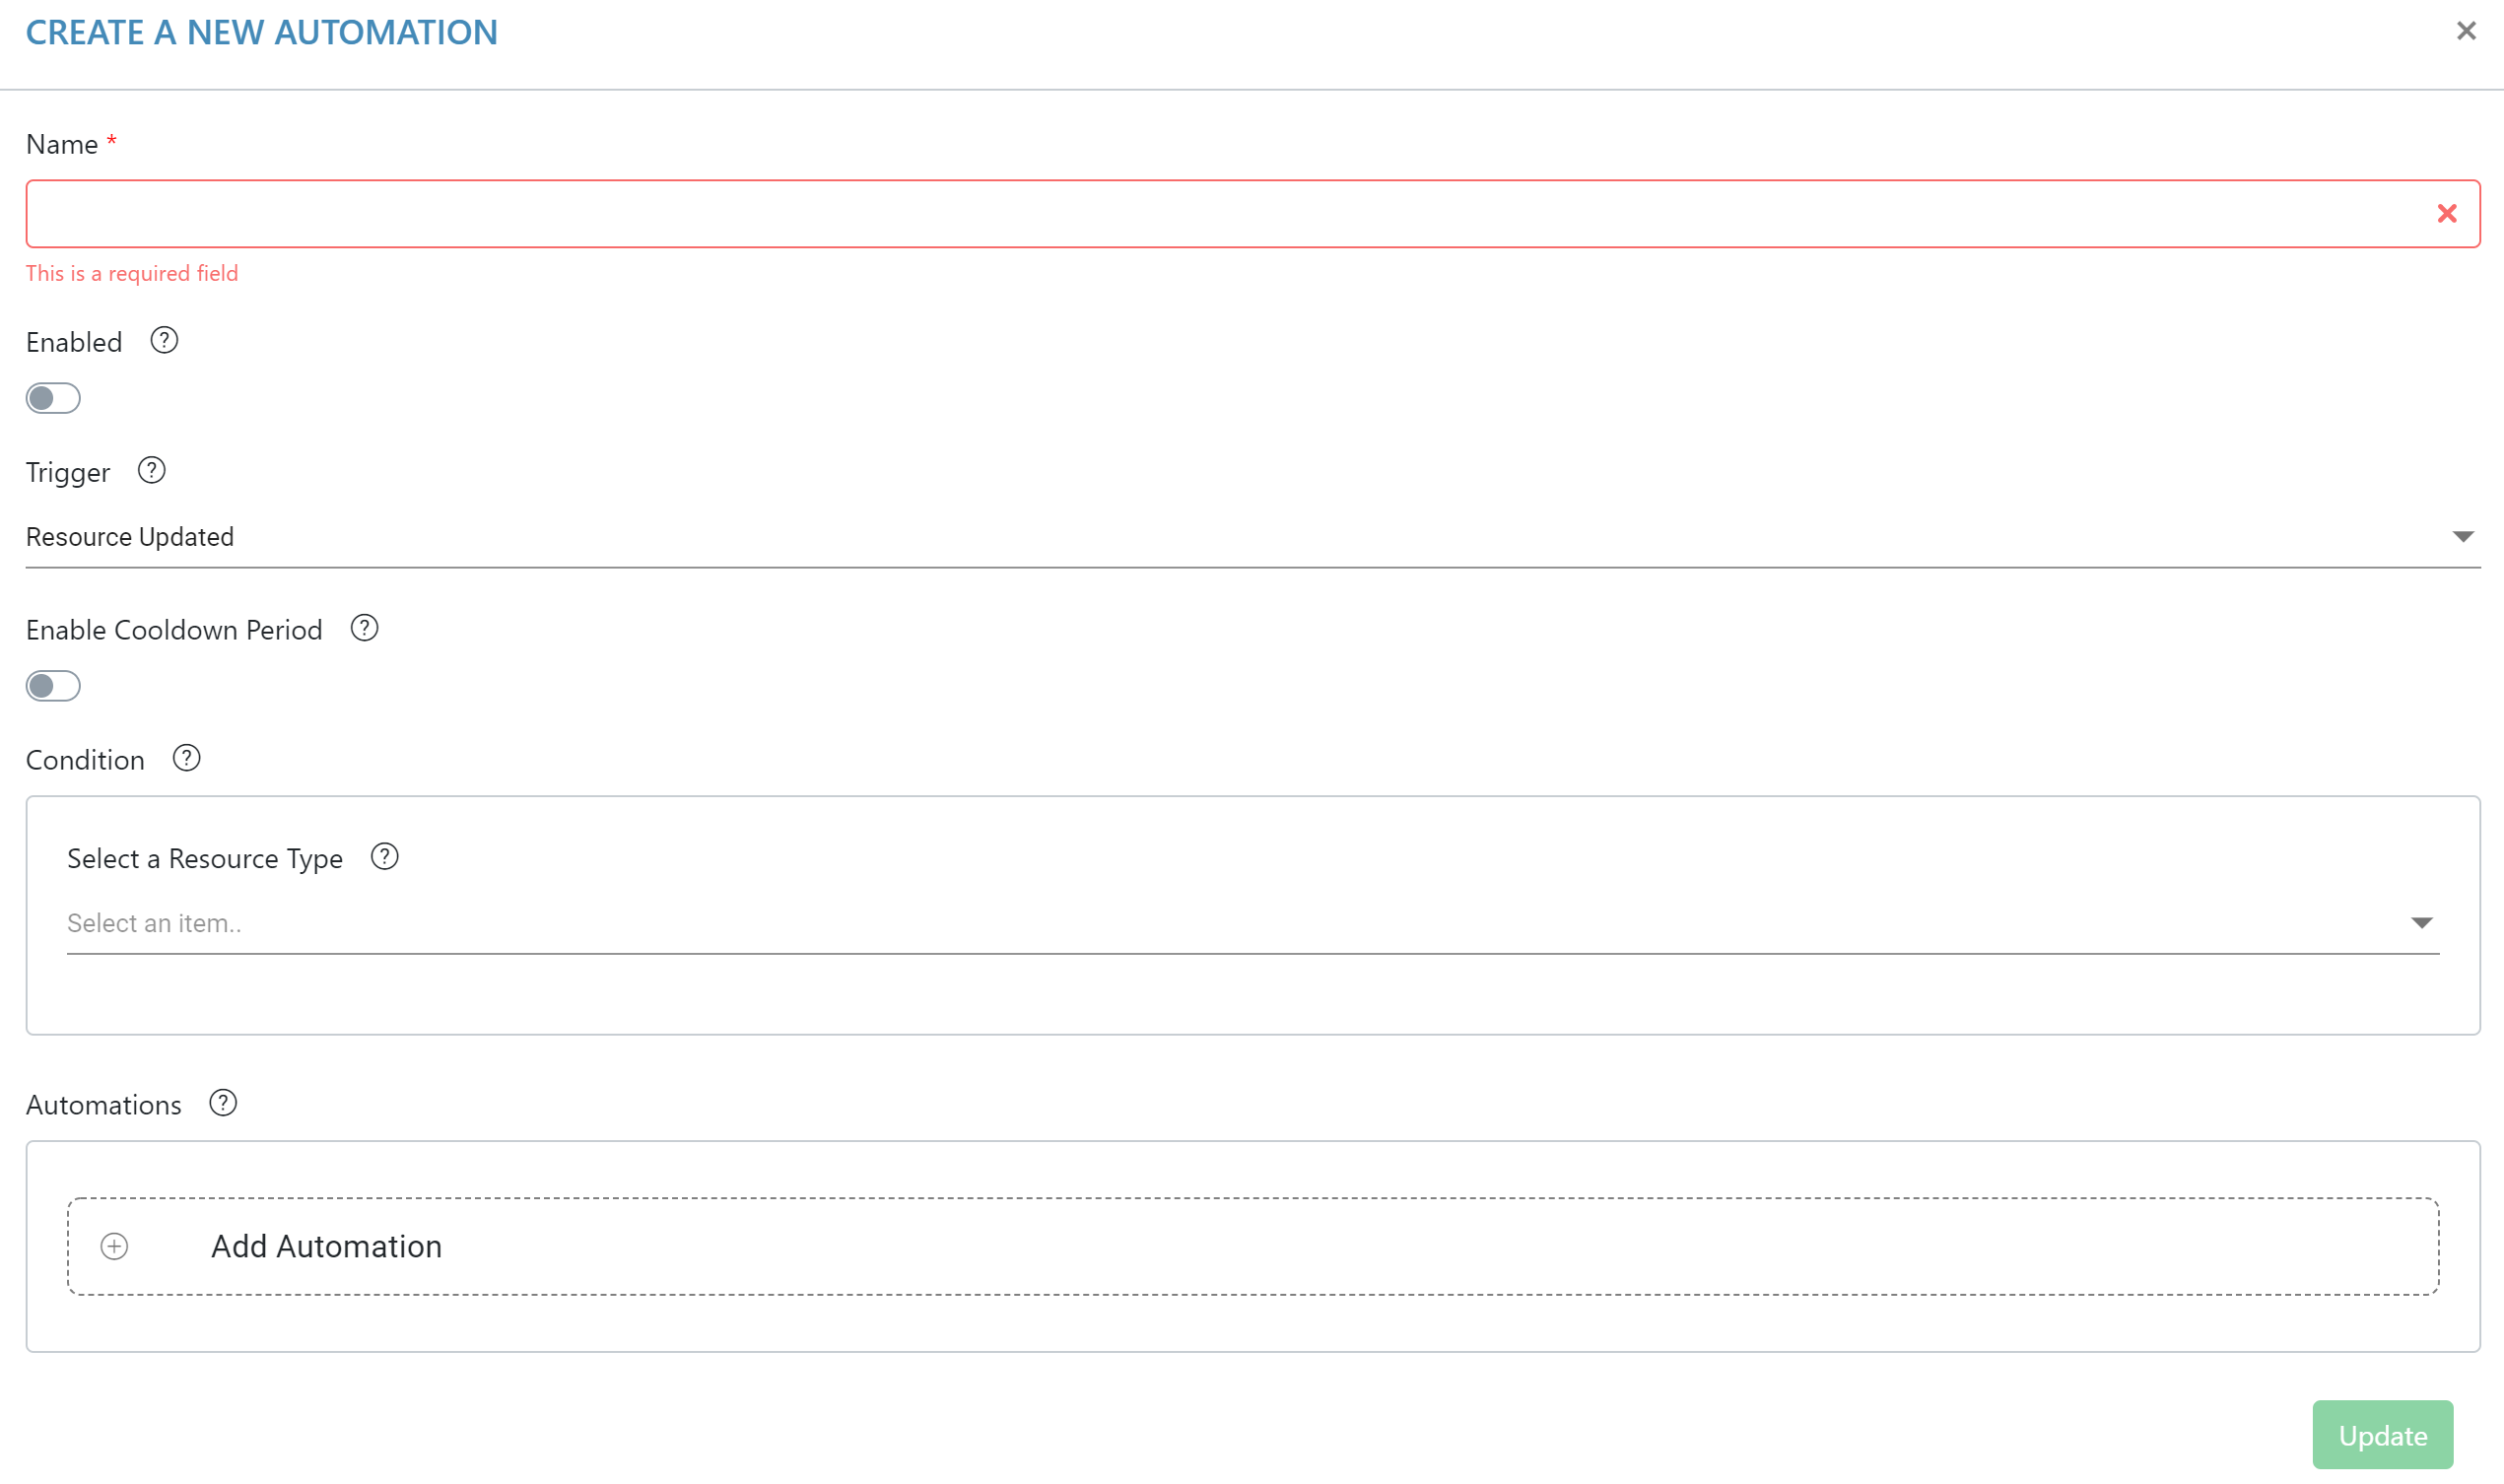
7. Enabling the cooldown period will generate a text field that will allow the user to set a time interval, essentially disabling the Automation during the cooldown period. The cooldown period starts immediately after an Automation has been triggered and completed.
8. Use the ‘Conditions’ field to set the desired conditions for this Automation. In this case, we will be setting conditions regarding System Residual Risk.
9. Click on the ‘Resource Type' drop down box
10. Select ‘System’
11. The user may add rules to the condition
12. Click on the circled '+' symbol
13. Now the user may select what resource the Automation is going to check when running. In this case, we are going to select ‘Residual Risk’.
14. Enter in the threshold value for the Automation, and select how the Automation is going to compare the controlled value to the value being pulled from the Information System.
15. At the bottom of the modal, click ‘Add Automation’
16. Select the ‘Email' Automation type
17. The user may now select an ‘Email Template’, Refer to How To Create An Email Template for more information on Email Templates.
18. Once the user has selected an Email Template, click ‘Submit’ at the bottom of the modal.